Epic Chest & Back Workout For Monster Upper Body

Achieving a perfect chest and back workout requires a balanced routine that targets all major muscle groups in the upper body.
By combining effective exercises with proper form and progressive overload, you can maximize strength and muscle growth.
Keep reading for a detailed explanation on how to structure and perform these exercises effectively.
Superset 1: Bench Press and Barbell Row
Supersetting the bench press with the barbell row is an excellent way to target both the chest and back muscles simultaneously.
This approach not only saves time but also promotes balanced muscle development and enhances overall workout intensity.
Detailed Breakdown of Bench Press
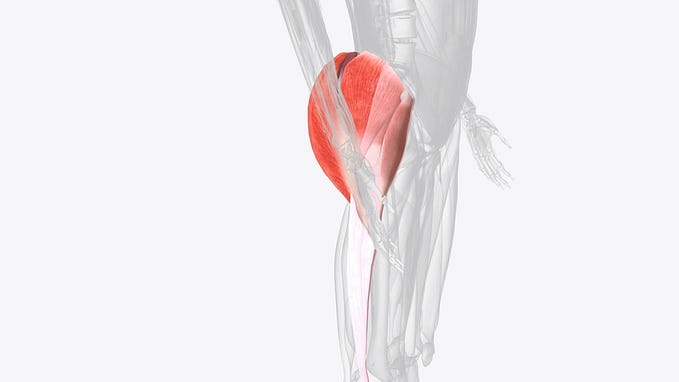
The bench press is a fundamental exercise for building upper body strength, primarily targeting the pectoral muscles, triceps, and shoulders.
Equipment Options: Barbell vs. Dumbbells
Choosing between a barbell and dumbbells for the bench press depends on your goals and personal preference.
A barbell allows for lifting heavier weights and is ideal for building maximal strength.
Dumbbells, on the other hand, offer a greater range of motion and help in improving muscle balance and stability by engaging more stabilizing muscles.
Step-by-Step Guide to Proper Form
- Setup: Lie flat on a bench with your feet firmly planted on the ground. Position your eyes directly under the bar if using a barbell.
- Grip: Grip the bar slightly wider than shoulder-width apart. If using dumbbells, hold them with a neutral grip above your chest.
- Unrack and Position: Unrack the bar and position it directly above your chest with your arms fully extended.
- Lowering Phase: Lower the bar or dumbbells slowly to your chest, keeping your elbows at a 45-degree angle to your body. Maintain a tight core and flat back.
- Pressing Phase: Press the weight back up to the starting position by extending your arms fully while squeezing your chest muscles.
- Reps and Sets: Perform 3 sets of 6–12 reps, adjusting the weight to ensure you reach near-failure by the end of each set.
Common Mistakes and How to Avoid Them
- Arching the Back Excessively: Maintain a slight arch in your lower back, but avoid excessive arching, which can lead to injury. Engage your core throughout the exercise.
- Flared Elbows: Keep your elbows at a 45-degree angle to prevent shoulder strain.
- Bouncing the Bar: Lower the weight in a controlled manner and avoid bouncing it off your chest. This ensures maximum muscle engagement and reduces injury risk.
Detailed Breakdown of Barbell Row
The barbell row is a key exercise for developing a strong, thick back, targeting the latissimus dorsi, rhomboids, and trapezius muscles.
Proper Hip Hinge and Grip Technique
- Setup: Stand with your feet shoulder-width apart, and grip the barbell with an overhand grip, slightly wider than shoulder-width.
- Hip Hinge: Bend at the hips while keeping your back straight and knees slightly bent. Your torso should be almost parallel to the ground.
- Grip: Ensure a firm grip on the barbell to maintain control throughout the movement.
Tips for Maximizing Muscle Engagement
- Rowing Motion: Pull the bar towards your lower chest or upper abdomen, focusing on squeezing your shoulder blades together at the top of the movement.
- Controlled Lowering: Lower the bar slowly to the starting position, maintaining tension in your back muscles.
- Breathing: Inhale as you lower the bar and exhale as you pull it towards your body.
Avoiding Lower Back Strain
- Core Engagement: Keep your core muscles engaged throughout the exercise to support your lower back.
- Proper Form: Ensure your back remains straight and avoid rounding your shoulders.
- Weight Selection: Choose a weight that allows you to maintain proper form without compromising your lower back integrity.
Superset 2: Incline Dumbbell Press and Lat Pulldown
Supersetting the incline dumbbell press with the lat pulldown targets the upper chest and back muscles, ensuring a balanced and effective workout.
This combination not only enhances muscle growth but also promotes upper body strength and stability.
Detailed Breakdown of Incline Dumbbell Press
The incline dumbbell press is a vital exercise for developing the upper portion of the pectoral muscles.
This exercise also engages the shoulders and triceps, making it a comprehensive upper body movement.
Setting the Correct Bench Angle
To maximize the effectiveness of the incline dumbbell press, setting the correct bench angle is crucial.
Ideally, the bench should be set at a 45-degree angle.
This angle specifically targets the upper chest without placing excessive strain on the shoulders.
Too steep an angle can shift the emphasis to the shoulders, while too shallow an angle may not adequately target the upper chest.
Technique for Controlled Movements
- Starting Position: Sit on the incline bench with your feet firmly planted on the ground. Hold a dumbbell in each hand, resting them on your thighs.
- Lifting the Dumbbells: As you lie back, use your thighs to help lift the dumbbells to shoulder height. Your palms should be facing forward, and your elbows bent at about 90 degrees.
- Pressing Motion: Press the dumbbells upward by extending your arms fully, bringing them together above your chest. Focus on squeezing your chest muscles at the top of the movement.
- Lowering Motion: Slowly lower the dumbbells back to the starting position, ensuring a controlled descent. Maintain tension in your chest throughout the movement.
- Breathing: Exhale as you press the dumbbells up and inhale as you lower them.
Adjusting Weight for Different Strength Levels
Select a weight that allows you to complete 8–12 reps per set with proper form.
If you are a beginner, start with lighter weights to master the technique.
As you gain strength, gradually increase the weight to continue challenging your muscles.
Always prioritize form over lifting heavier weights to prevent injuries and maximize muscle engagement.
Detailed Breakdown of Lat Pulldown
The lat pulldown is a fundamental exercise for building a wide and strong back.
It primarily targets the latissimus dorsi muscles while also engaging the biceps and middle back.
Choosing the Right Grip Width
Grip width plays a significant role in the effectiveness of the lat pulldown.
A wider grip focuses more on the lats, while a narrower grip can engage the biceps more.
For a balanced approach, use a grip that is slightly wider than shoulder-width.
This width effectively targets the lats without overly involving the biceps.
Engaging the Lats Effectively
- Starting Position: Sit at the lat pulldown machine and adjust the knee pad to ensure your legs are secure. Grab the bar with a wide overhand grip.
- Pulling Motion: Lean back slightly from the hips, ensuring your chest is up and your back is straight. Pull the bar down towards your upper chest, focusing on squeezing your shoulder blades together. Keep your elbows pointed down and back.
- Lowering Motion: Slowly allow the bar to rise back to the starting position, maintaining control and tension in the lats.
- Breathing: Inhale as you pull the bar down and exhale as you let it rise back up.
Controlling the Eccentric Phase
The eccentric (lowering) phase of the lat pulldown is critical for muscle growth.
Lower the bar in a slow and controlled manner, taking about 2–3 seconds for this phase.
This controlled descent maximizes muscle engagement and promotes better muscle hypertrophy.
Superset 3: Decline Bench Press and T-Bar Row

Combining the decline bench press with the T-bar row in a superset is an effective way to target the lower chest and various muscles of the back.
This superset ensures balanced development and helps in building both strength and muscle mass in the upper body.
Detailed Breakdown of Decline Bench Press
The decline bench press focuses on the lower part of the pectoral muscles.
It also engages the triceps and shoulders, making it a comprehensive exercise for the upper body.
Adjusting the Decline Bench Properly
To maximize the benefits of the decline bench press, it’s crucial to set up the bench correctly.
The bench should be set at a decline of about 15–30 degrees.
This angle specifically targets the lower chest while reducing the strain on the shoulders.
- Setup: Lie down on the decline bench with your feet secured under the foot pads. Your body should be stable and balanced.
- Grip: Use a grip that is slightly wider than shoulder-width for a barbell. If using dumbbells, hold them with a neutral grip above your chest.
Safety Tips for Decline Press
- Spotter: If you’re lifting heavy weights, use a spotter to ensure safety and help in case you reach failure.
- Controlled Movements: Lower the weight in a controlled manner to avoid any jerking motions, which can lead to injury.
- Breathing: Exhale as you press the weight up and inhale as you lower it.
Differences between Barbell and Dumbbell Variations
Using a barbell allows for lifting heavier weights and is generally easier to control.
Dumbbells, however, provide a greater range of motion and require more stabilization, which can help in correcting muscle imbalances.
- Barbell Decline Press: Allows for symmetrical loading and typically heavier lifts. Ensure a firm grip and controlled movement.
- Dumbbell Decline Press: Promotes greater muscle activation and stabilization. Focus on maintaining balance and equal strength in both arms.
Detailed Breakdown of T-Bar Row
The T-bar row is a powerful exercise for developing back thickness and strength.
It primarily targets the middle back, including the latissimus dorsi, rhomboids, and trapezius muscles.
Proper Stance and Grip
- Setup: Position yourself over the T-bar row machine or a barbell loaded on one end. Stand with your feet shoulder-width apart.
- Stance: Bend at the hips and knees slightly, keeping your back flat. Your torso should be almost parallel to the ground.
- Grip: Use a close grip handle for a neutral grip or an overhand grip on a barbell attachment. The grip should be firm and secure.
Maintaining a Flat Back and Tight Core
Maintaining proper form is essential to avoid injury and maximize muscle engagement.
Keep your back flat throughout the movement to prevent lower back strain.
Engage your core muscles to stabilize your body.
- Rowing Motion: Pull the bar towards your torso, squeezing your shoulder blades together at the top of the movement. Focus on the contraction in your back muscles.
- Controlled Lowering: Slowly lower the bar back to the starting position, maintaining control and tension in your muscles.
- Breathing: Inhale as you lower the weight and exhale as you pull it towards your body.
Variations to Target Different Parts of the Back
- Wide Grip T-Bar Row: Using a wider grip can emphasize the upper back and rear deltoids more.
- Narrow Grip T-Bar Row: A narrow grip targets the middle back and emphasizes the contraction of the rhomboids and lower traps.
Superset 4: Chest Dips and Seated Cable Row
Incorporating chest dips and seated cable rows into a superset is an excellent way to target both the chest and back muscles.
This combination promotes muscle balance and enhances upper body strength and endurance.
Detailed Breakdown of Chest Dips
Chest dips are a highly effective bodyweight exercise that targets the lower part of the chest, triceps, and shoulders.
When performed correctly, they can significantly contribute to upper body strength and muscle definition.
Using Parallel Bars Effectively
To perform chest dips, you will need parallel bars or a dip station. Here’s how to use them effectively:
- Starting Position: Grip the parallel bars firmly with your palms facing inward. Lift your body off the ground, fully extending your arms.
- Body Position: Lean slightly forward to emphasize the chest muscles. Your legs can be bent at the knees and crossed for balance.
Techniques for Maximizing Chest Activation
- Lowering Phase: Lower your body slowly by bending your elbows, allowing your torso to lean forward. Aim to go down until your shoulders are below your elbows, feeling a stretch in your chest.
- Pressing Phase: Push your body back up to the starting position by straightening your arms. Focus on squeezing your chest muscles at the top of the movement.
- Breathing: Inhale as you lower your body and exhale as you push back up.
Common Mistakes and Corrections
- Elbow Flare: Avoid flaring your elbows out too much, which can lead to shoulder strain. Keep them at a 45-degree angle to your body.
- Insufficient Depth: Not lowering your body enough reduces the effectiveness of the exercise. Aim for a full range of motion for maximum benefit.
- Swinging Body: Maintain a controlled movement without swinging your body. This ensures muscle engagement and reduces injury risk.
Detailed Breakdown of Seated Cable Row
The seated cable row is a staple exercise for developing a strong, thick back.
It targets the latissimus dorsi, rhomboids, and trapezius muscles, promoting better posture and overall back strength.
Setting the Correct Seat Height
Proper seat height is crucial for performing seated cable rows effectively.
Adjust the seat so that your feet are flat on the foot platform, and your knees are slightly bent.
Your torso should be upright with a slight lean forward from the hips.
Engaging the Back Muscles Properly
- Starting Position: Sit on the machine with your feet firmly planted on the foot platform. Grab the handle with an overhand grip, ensuring your back is straight and core engaged.
- Pulling Motion: Pull the handle towards your abdomen, squeezing your shoulder blades together. Keep your elbows close to your body and avoid using your lower back to pull.
- Full Contraction: Focus on engaging the back muscles, particularly the lats and rhomboids, by squeezing them at the end of the pull.
Tips for a Controlled Release
- Slow Release: Slowly return the handle to the starting position, maintaining control over the movement. This eccentric phase is crucial for muscle growth and preventing injuries.
- Maintaining Tension: Keep constant tension on your back muscles throughout the movement, avoiding letting the weights rest between reps.
- Breathing: Inhale as you pull the handle towards you and exhale as you release it back to the starting position.
Finisher: Dumbbell Pullover
The dumbbell pullover is a versatile and effective finisher exercise that targets both the chest and back muscles.
Incorporating this exercise at the end of your workout helps stretch and strengthen the upper body, promoting muscle growth and flexibility.
Detailed Breakdown of Dumbbell Pullover
The dumbbell pullover is performed on a flat bench and engages multiple muscle groups, making it an excellent exercise to conclude your chest and back workout.
Here’s how to execute it correctly.
Proper Starting Position and Grip
- Bench Setup: Lie perpendicular on a flat bench with only your upper back and shoulders supported. Your lower body should be off the bench, feet firmly planted on the floor for stability.
- Grip: Hold a dumbbell with both hands, gripping the upper part of the dumbbell plate with your palms facing upward (a diamond grip).
- Initial Position: Extend your arms fully above your chest, keeping a slight bend in your elbows. This is your starting position.
Controlling the Range of Motion
- Lowering Phase: Slowly lower the dumbbell in an arc motion behind your head. Keep your arms slightly bent throughout the movement to avoid putting too much strain on your elbows.
- Stretching: Lower the dumbbell as far as comfortably possible while maintaining control. You should feel a stretch in your chest and lats.
- Returning Phase: Reverse the motion, bringing the dumbbell back to the starting position above your chest. Focus on using your chest and back muscles to lift the weight, not your arms.
- Breathing: Inhale as you lower the dumbbell and exhale as you bring it back to the starting position.
Benefits for Both Chest and Back Muscles
The dumbbell pullover is unique in that it effectively targets both the chest and back muscles.
Here’s how it benefits each:
- Chest: During the lifting phase, the pectoral muscles are heavily engaged, particularly when you bring the dumbbell back to the starting position. This movement helps to expand the chest and improve overall muscle tone.
- Back: The lowering phase engages the latissimus dorsi and other muscles of the upper back. The stretch provided by this exercise can enhance flexibility and contribute to a more defined back.
- Additional Benefits: Besides targeting the chest and back, the dumbbell pullover also engages the serratus anterior, shoulders, and triceps. It promotes better posture by stretching the muscles around the rib cage and improving shoulder mobility.
Tips for Progression and Safety
Ensuring steady progress and maintaining safety during your chest and back workouts is crucial for achieving optimal results and preventing injuries.
Here’s an in-depth guide on how to progressively overload, maintain proper form, manage rest intervals, and incorporate a cool-down routine effectively.
Importance of Progressive Overload
Progressive overload is the cornerstone of building strength and muscle.
It involves gradually increasing the stress placed on your muscles to stimulate growth and adaptation.
Techniques for Gradually Increasing Weight
To apply progressive overload, start by gradually increasing the weights you lift.
Aim to add small increments of weight each week or every other week, depending on your progress.
This method ensures your muscles are continually challenged, promoting growth and strength development.
Alternative Methods: Increasing Reps or Sets
If increasing weight isn’t always feasible, you can also apply progressive overload by increasing the number of repetitions or sets.
For example, if you can perform 8 reps comfortably, aim for 10 reps the next session, or add an additional set to your routine.
Another method is to decrease rest time between sets, which increases workout intensity.
Maintaining Form and Technique
Proper form and technique are essential for maximizing muscle engagement and preventing injuries.
Tips for Each Exercise to Prevent Injuries
- Bench Press: Keep your back flat on the bench, feet firmly planted on the floor, and elbows at a 45-degree angle. Avoid bouncing the bar off your chest.
- Barbell Row: Maintain a flat back and slight bend in the knees. Pull the bar towards your lower chest, not your stomach, to avoid lower back strain.
- Incline Dumbbell Press: Ensure the bench is at a 45-degree angle. Lower the dumbbells slowly and avoid locking your elbows at the top.
- Lat Pulldown: Use a wide grip and avoid pulling the bar behind your neck. Pull the bar to your upper chest, squeezing your shoulder blades together.
- Decline Bench Press: Secure your feet under the foot pads and use a controlled motion. Avoid flaring your elbows out too much.
- T-Bar Row: Keep your back flat and core tight. Use a controlled motion and avoid using momentum to lift the weight.
- Chest Dips: Lean slightly forward to target the chest. Lower your body until your shoulders are below your elbows, then press back up.
- Seated Cable Row: Keep your back straight and pull the handle towards your abdomen, squeezing your shoulder blades together.
Importance of Core Engagement
Engaging your core during exercises helps stabilize your body, reduces the risk of injury, and improves overall strength.
Focus on keeping your core tight during all movements, which provides a solid foundation for lifting.
Rest Intervals and Recovery
Adequate rest and recovery are vital for muscle growth and performance.
Optimal Rest Time Between Supersets
Rest for 60–90 seconds between supersets to allow your muscles to recover while maintaining workout intensity.
This rest period ensures you are not overly fatigued, allowing you to perform each exercise with proper form.
Benefits of Adequate Recovery
Recovery is when your muscles repair and grow stronger.
Ensure you get enough sleep, stay hydrated, and maintain a balanced diet rich in protein to support muscle recovery.
Taking rest days is also crucial to prevent overtraining and injuries.
Cool Down Routine
A proper cool-down routine helps transition your body from intense exercise to a state of rest, reducing muscle soreness and improving flexibility.
Recommended Stretching Exercises
- Chest Stretch: Stand in a doorway, place your hands on the door frame, and gently lean forward to stretch your chest muscles.
- Lat Stretch: Extend one arm overhead and lean to the opposite side, feeling a stretch along your side and lat muscles.
- Shoulder Stretch: Bring one arm across your chest and use the opposite hand to gently pull it closer.
- Upper Back Stretch: Interlace your fingers and extend your arms forward, rounding your upper back and feeling the stretch between your shoulder blades.
Benefits for Flexibility and Muscle Soreness Reduction
Stretching after a workout helps reduce muscle tightness and soreness, promoting faster recovery.
It also improves flexibility and range of motion, which can enhance performance in future workouts and reduce the risk of injuries.
Conclusion
Incorporating these chest and back exercises into your routine ensures balanced muscle development and enhanced strength.
Prioritize proper form, progressive overload, and adequate recovery to maximize your results.
Consistency and attention to detail will lead to significant improvements in your upper body fitness.